Wednesday, June 17, 2009

Opera Unite provides webserver, chat room, file sharing right from your PC.

Opera Unite was launched on 16th June 09 and I decided to give it a try on first day. When I clicked on the download link on Opera Unite page it was nothing but version 10.00 Beta of Opera browser. I downloaded the .deb package and installed on Ubuntu Jaunty Jaackalope.

When I opened the browser there was Unite icon on side panel. I could use myopera userid and password to setup the system on my PC. Immediately I could start the chatroom on my PC and send the link to my friends and chat with them.

I had developed some content regarding my experience on steam Turbines using Tiddlywiki in 2007. I could immediately setup website on my PC using that content.

For sharing photos and files I don't need to upload them anywhere. My friends could download directly from my PC.

All these things have become so easy for common user.

Wednesday, June 03, 2009

Uzbl the new usable browser on Ubuntu 9.04 Jaunty Jackalope

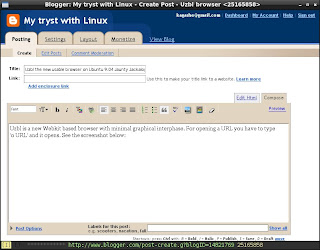
Uzbl is a new Webkit based browser with minimal graphical interphase. For opening a URL you have to type 'o URL' and it opens. See the screenshot below:


For adding a bookmark you have to type 'B'. For loading a bookmark you have to type 'u' and for loading a URL from history you have to type 'U'.

Actually o, B, u, U etc are keybindings defined in the config file and B, u and U also call the required scripts.

Tabbed browsing is not available but you can open any number of windows for different URLs.

This browser is being developed on Archlinux and easily installable from AUR. The bookmarks and history use the utility dmenu which has been patched for displaying the URLs vertically and available as dmenu-vertical in AUR.

After installation you can start the browser with 'uzbl' command but you get a blank browser window which does nothing since there is no default configuration. You need to create 'uzbl' folder in ~/.config and copy the following two files in it:
cp /usr/share/uzbl/examples/configs/sampleconfig ~/.config/uzbl/config
cp /usr/share/uzbl/examples/configs/cookies ~/.config/uzbl/

For bookmarks you need to create 'uzbl' folder in ~/.local/share and copy the file:
cp /usr/share/uzbl/examples/data/bookmarks ~/.local/share/uzbl/

and create an empty session file:
cd ~/.local/share/uzbl
touch session
You can also create a launcher uzbl.desktop:
[Desktop Entry]
Encoding=UTF-8
Name=Uzbl
GenericName=uzbl
Exec=/usr/bin/uzbl %u
Terminal=false
Type=Application
Categories=Application;Network;
Icon=applications-internet
All the above settings are required even on Archlinux on which it is being developed since the developer is trying to just give a browser with all other things managed from scripts outside the browser, although, thy are giving 'example scripts' and the settings given above configure these example scripts to work in conjunction with the browser.

Now let us come to installation of uzbl on Ubuntu 9.04 Jaunty Jackalope.

For installing the recent version of Webkit Library add the following sources to /etc/apt/sources.list
deb http://ppa.launchpad.net/webkit-team/ppa/ubuntu intrepid main
deb-src http://ppa.launchpad.net/webkit-team/ppa/ubuntu intrepid main
to import keys
sudo apt-key adv --recv-keys --keyserver keyserver.ubuntu.com 0x991e6cf92d9a3c5b
and to install
sudo apt-get update
sudo apt-get install git git-core libwebkit-dev
to compile and install uzbl
git clone git://github.com/Dieterbe/uzbl.git
cd uzbl
make
sudo make install
After installation on Ubuntu you need to create uzbl directory in ~/.config and ~/.local/share and copy/create the files as stated above.

In addition, Ubuntu does not have $XDG_DATA_HOME set to ~/.local/share by default and dmenu-vertical is not available in Debian/Ubuntu repositories. These things are required by the example scripts.

There are various ways to set the environment variable $XDG_DATA_HOME but I simply decided to put the following line in the load_url_from_bookmarks and insert_bookmark scripts for the time being.
XDG_DATA_HOME=~/.local/share
I have downloaded dmenu-4.0 sources from:
wget http://code.suckless.org/dl/tools/dmenu-4.0.tar.gz

and the required patch from:
wget http://evaryont.me/dmenu-vertical-history.patch
and compiled dmenu-vertical:
tar -xvzf dmenu-4.0.tar.gz
cd dmenu-4.0
patch -p1 < ~/path-to/dmenu-vertical-history.patch
make
sudo checkinstall
I used checkinstall to make .deb package of dmenu-vetical.

Monday, June 01, 2009

VOIP to Gtalk, YM, MSN using Gizmo.

I have setup Gizmo on Ubuntu and called couple of friends (Windows users) on their Gtalk and Yahoo Messenger and had voice chat today and surprised them.

Gizmo has not updated its Linux version since Nov 2007 and there is lot of criticism by Linux users on its forum. I had to use OSS to make the audio work.

Once setup and audio checked through free sip call to Echo Test I could easily import the Gtalk and YM buddies and could have text chat with online buddies but voice chat did not work. This was happening because they were setup as user_id@xmpp.chat.gizmoproject.com (Gtalk) user_id@yahoo.chat.gizmoproject.com

Then I added one contact as user_id@gmail.com and called him and had successful voice chat.

Friday, May 29, 2009

Booting sidux from iso with persistent

I wanted to try sidux since long time. I downloaded the KDE lite version and searched on Google for 'sidux boot from iso' and got the page Booting with "fromiso" of sidux manual.

I created sidux folder at the root of an ext3 partition and copied the iso, vmlinuz and initd.img as per instructions and created following entry in /boot/grub/menu.lst

title sidux 32bit from ISO
kernel (hd0,X)/sidux/vmlinuz boot=fll quiet vga=791 fromiso=/sidux/sidux.iso persist
initrd (hd0,X)/sidux/initrd.img

After booting into sidux KDE 3.5.10 desktop I configured static IP through Ceni. Then I added noxorgconf and nonetwork boot parameters so that sidux does not create xorg.conf and reconfigures the network on reboot.

Since I don't like browsing with Konqueror I installed Iceweasel.

After reboot I found my static IP configuration intact and Iceweasel available.

The persist boot parameter creates folder fll at the root of same partition and uses the remaining space on the partition.

Wednesday, May 27, 2009

Installation of Archlinux from archiso-live-2009-05-24.iso

I had earlier installed Archlinux after downloading Core installer and following Beginners Guide on ArchWiki.

After reading about Archlinux Live CD archiso-live developed by godane on latest issue of Distrowatch Weekly I decided to give it a try and also use the installer.

I was very much impressed with the Live CD with Xfce as default and choice of LXDE, e17, gnome, openbox-session, Fluxbox by pressing F1 key at Slim Login Manager. The normal user login is arch/arch and root login is root/ArchLinux

The choice of applications is also good:
Blender, Comix, GIMP, GPICViewer, Rawstudio, mtPaint in Graphics category
Arista, Asunder, Audacious, Audacity, Avidemux, Elisa, Hydrogen, VLC in Multimedia category
Abiword, Gnumeric, HomeBank in Office category.

I decided to give the installer a try. Initially, the installer produced some errors after partitioning stage while copying files. I googled for the errors and decided to logout and login as root.

The installer worked this time and copied all the files successfully and failed at Bootloader stage (which I did not want to use anyway).

I found the installation in order except /etc/fstab (which was meant for Live CD) and some tweaks needed in /etc/rc.conf file DAEMONS line. I used the Beginners Guide to build /etc/fstab and also corrected the DAEMONS line.

I made an entry in present /boot/grub/menu.lst as suggested in Beginners Guide and I could boot into the installed Archlinux.

I found that the installer did not delete the Live CD user "arch", therefore, I logged in as arch password arch and everything is working fine.

I updated the system through pacman and found upgrades to clamav, docbook, pidgin, xchm and openvpn which I applied.
Wednesday, May 13, 2009

Ulx 9.04 Ubuntu based LXDE Live CD with all applications.

Today I am putting new iso of Ulx 9.04 on Linuxtracker.org which has Ubuntu 9.04 minus Gnome (replaced by LXDE), gnome-panel (replaced by lxpanel), Nautilus (replaced by PCManFM), gnome-terminal (replaced by LXTermina), gedit (replaced by Leafpad) but all other applications on LXDE Desktop. I have removed things which refer to Ubuntu like usplash (replaced by LXDE splashy), Ubuntu Docs, Ubuntu themes and wallpapers, Ubufox etc, GDM Ubuntu Themes. COMPIZ is also removed (replaced by Openbox).

It has gnome-games, Brasero, Movie Player (xine based), Rhythmbox, Pulse-audio, F-spot, GIMP, GPICViewer, XSane, Network Manager, Add/Remove, Computer Janitor, Language Support, Network Tools, Synaptic, System Monitor, Update Manager, Ekiga, Evolution, Firefox, Pidgin, Transmission, Open Office (minus Dictionery, language support). In short everything Ubuntu 9.04 has.

Some people may say it is as heavy as Ubuntu itself, may be. I have not tried to make it lighter by removing applications but I am sure the distrolet is lighter than Xubuntu.

In addition, I have written a small utility "mykeyboard" which helps in adding a Keyboard Layout to the default US Layout and added fbxkb to toggle.

Please download from torrent, seed it for some time, try it and post your comments here.

Sunday, May 03, 2009

Ulx -- Ubuntu 9.04 distrolet with LXDE.

Today I made Ubuntu 9.04 LXDE Live CD and uploaded the iso on LinuxTracker. This is an experimental effort to get user feedback. At present it has Firefox 3.0.10 OpenOffice 3.0.1 gnome-games Leafpad only.

I am going to add multimedia applications and upload another iso image shortly.

Users are requested to write their feedback about Ulx 9.04 under comments on this blog post.

Sunday, April 12, 2009

xserver crash on restart taught me optimised use of memory.

I have a machine which originally arrived with 128 MB RAM and Linux Distributions with 2.4 series kernels (Mandrakelinux 9.1) worked well with this memory. Even Ubuntu 5.04 with 2.6 series kernel worked vey well.

Subsequently I added 256 MB RAM to the machine making it 384 MB to use Ubuntu 6.06 Dapper Drake properly.

I soon learnt to use lightweight Window Managers to have good speed with later versions of Ubuntu and also tried Debian and Arch Linux to further optimise thye memory usage.

The video setting in the BIOS was on "Auto" and 72 MB RAM was getting allocated towards the video leaving 312 MB for the OS.

Although Ubuntu says that its Live CD works with 256 MB RAM it is very slow and even 312 MB is less for effective use.

Recently I downloaded Ubuntu 9.04 Beta Live CD and in order to use it effectively changed the video setting in the BIOS to minimum (8 MB). The memory available for the Live CD was 360 MB (instead of 312 MB) and it worked very well.

Subsequently I forgot to restore the BIOS setting and continued using Linuxes installed on the hard disk (Ubuntu Hardy, Archlinux and antiX). They were working very well till I decided to change the Window Manager on Ubuntu Hardy and logged out of GDM to change session. To my surprise, the xserver crashed. I checked restart of xserver on Archlinux and antiX and it crashed on those distributions as well.

I googled for "xserver crash on restart" and read many bug reports and tried some remedies. Ultimetly I discovered the BIOS video setting and changed it to "Auto" once again.

Then I remembered that I had tested "logout" on Ubuntu 9.04 Beta Live CD and xserver did not crash.

I changed the BIOS video seiing to 16 MB and found that Archlinux (with xserver 1.5) did not crash on restart but Ubuntu Hardy Heron (which has xserver 1.4) required 32 MB setting in the BIOS.

Today I upgraded to xserver 1.6.0 on Archlinux and it is not crashing on restart with minimum (8 MB) video setting in the BIOS (like Ubuntu 9.04 Beta). With this setting the available memory for the OS has jumped from 312 MB to 367 MB.

Sunday, March 22, 2009

Debian Live LXDE persistent mode

I was very happy that Debian Lenny had Live LXDE Desktop CD. I had tried it briefly earlier. Today I decided to use the persistent mode i.e. changes saved in live-rw file and used on reboot.

As always I copied the contents of Debian Live LXDE iso to a 1 GB partition and edited /boot/grub/menu.lst to make following entries:
title Debian Live LXDE
root (hd0,7)
kernel /live/vmlinuz1 boot=live union=aufs ip=frommedia swapon timezone=Asia/Kolkata persistent noprompt
initrd /live/initrd1.img
Explanation of boot parameters:
boot=live union=aufs This is copied from live.cfg file in isolinux directory
ip=frommedia This tells the system to read configuration from /etc/network/interfaces saved from earlier boots.
persistent This tells the system to look for live-rw home-rw partitions or files on the hard disk
noprompt This tells the system not to wait for removing Live CD on shutdown/restart

For persistent media I created live-rw on one partition (mounted at /media/disk) as follows:
$ dd if=/dev/null of=live-rw bs=512M seek=1
$ /sbin/mkfs.ext2 -F live-rw
$ sudo mv live-rw /media/disk
Just to check that persistent includes the installed .debs I installed ttf-indic-fonts:
$ sudo apt-get install ttf-devanagari-fonts
and the fonts are available on reboot.

All my personal settings are available, although, I did not create separate home-rw because live-rw includes changes to /home/user

Wednesday, March 11, 2009

Couple of steps on Zenwalk 6.0

Finally I have made Zenwalk 6.0 usable to my liking.

Setting static IP through Ethernet
Remove Wicd from Startup services:
Start Control_Panel (zenpanel}
Click on Startup_Services
Uncheck Wicd
Click OK.
Click on Session_and_Startup in XFCE Settings Manager.
Click on Application_Autostart
Uncheck on Wicd.
Close
Reboot.

Set up through netconfig (Just enter the required information):
$ su
Password:
# netconfig
Restart network (if you know how) or reboot.

Gmail Display problem
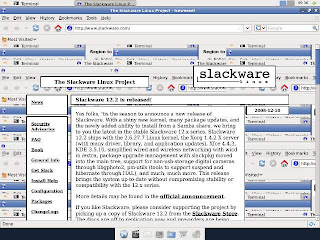
This is how Slackware site looked on Iceweasel on Zenwalk 6.0.

Similar problem was happening in Gmail. After reading on Zenwalk Forum I added the following lines in Device section of xorg.conf and it worked.
Option "AccelMethod" "XAA"
Option "XaaNoOffscreenPixmaps" "on"

Tuesday, March 10, 2009

Zenwalk 6.0

I decided to try the new Zenwalk 6.0. As usual I copied the contents of the iso to a partition and found nice article on Zenwalk Wiki. Accordingly I edited the existing /boot/grub/menu.lst:
title Zenwalk 6.0 install
root (hd0,X)
kernel /kernels/ata/bzImage
initrd /isolinux/initrd.img
As per instructions I selected "Exit setup" and got root shell where I mounted the extracted iso:
cd /
mkdir zeniso
mount /dev/sda(X+1) /zeniso
setup
and started the installation. When it asked for source selection I selected "Install from a pre-mounted directory" and when asked for the directory where the installation files are:
/zeniso
and continued the install. I did not install the bootloader and edited the /boot/grub/menu.lst once again to make an entry for Zenwalk:
title Zenwalk 6.0 (on /dev/hda6)
root (hd0,5)
kernel /boot/vmlinuz-2.6.28.7 root=/dev/sda6 ro
initrd /boot/initrd.splash
Next step was to connect to internet on newly installed Zenwalk 6.0 but I had to struggle because Wicd 1.5.9 does not detect the wired ethernet connections properly. I had to setup as follows:
$ su
Password:
# ifconfig eth0 down
# ifconfig eth1 192.168.1.3 netmask 255.255.255.0 up
# route add default gw 192.168.1.1
# exit
I am yet to find out a way to save the above configuration.

After choosing the timezone the clock did not indicate my time. I discovered that Zenwalk was assuming that the hardware clock was set to localtime (which is actually UTC). After struggling a little I found the file /etc/hardwareclock and changed the word 'localtime' to 'UTC' and it worked.

I also installed ttf-indic fonts and flash-plugin using Netpkg.

Zenwalk 6.0 has XFCE 4.6 which I had briefly used on Arch Linux the day it was released and now trying it on Zenwalk.

Tuesday, February 17, 2009

I am going to love antiX

I tested two Live CDs today. The first one was Debian LXDE Live downloaded from cdimage.debian.org/cdimage/release/current-live/i386/iso-cd/ It booted into nice LXDE Desktop with GIMP and OO apart from usual LXDE software. But there was no Network Manager and since my present router is not connected to NIC I had to manually configure the USB router by editing /etc/network/interfaces and /etc/resolv.conf But it is a good Live CD for machines having as low as 64 MB RAM. The Live CD does not have an installer and you can only have frugal type of install on hard disk.

The next Live CD was antiX-M8 'Intifada!' with IceWM as default Window Manager but believe me no distribution has such lovely IceWM fully configured:


I had Debian Lenny installed on one partition since Sep 08 which was not updated and the updates were huge. I decided to replace Debian Lenny with antiX since it is based on Debian Lenny with 2.6.27 Kernel.

Flash MPEG everything just works out of the box.

I am going to love antiX.

Wednesday, February 11, 2009

Enjoying the latest software on Arch Linux

I had installed Arch Linux on one of the partition in Sep 2008 but did not use it much since I was forced to use vesa driver because ati driver had a bug and it did not work on secondary monitor. Although Ubuntu 8.04 Hardy Heron had the same bug I could update the driver through Debian Sid in June 2008 after the bug was removed.

Arch Linux is a rolling distribution and latest packages are periodically transferred from testing to main repositories and you need to just upgrade the packages through pacman.

Xorg 7.4 was moved to extra repository on 30th Nov 2008 and I was eager to use it to test the driver. I upgraded Xorg and on reboot found that although the ati driver worked for the secondary monitor the touchpad did not work. After exploring I found that this version of Xorg had input hotplugging enabled by defaut. After reading on this page I added the following packages:
xf86-input-evdev xf86-input-vmmouse xf86-input-synaptics

and it worked.

Then I did the system wide upgrade and now I have:
Linux Kernel 2.6.28
Xorg 7.4 (xserver 1.5.3) working without xorg.conf
Gnome 2.24
Open Office 3.0.1
GIMP 2.6.4
All latest packages on LXDE

Monday, February 09, 2009

Upgrading to Open Office 3.0 on Ubuntu

Open Office 3.0 has been released but it is not available on Ubuntu 8.04 or 8.10. Fortunately it is available on Launchpad repository. Add the following repository to your software sources:
deb http://ppa.launchpad.net/openoffice-pkgs/ppa/ubuntu hardy main

Replace hardy with intrepid if you are running Ubuntu 8.10.

Get the PGP Key from the following URL:
http://keyserver.ubuntu.com:11371/pks/lookup?op=get&search=0x60D11217247D1CFF

Save the PGP Key to a text file and add it through Authentication tab and click Import Key File… on Software sources.

If you already have Open Office 2.4 you can do:
$ sudo apt-get update
$ sudo apt-get upgrade

otherwise you can install the entire office suite through:
$ sudo apt-get install openoffice.org

Sunday, February 08, 2009

Making custom Ubuntu Live CD using Remastersys

I use LXDE desktop on Ubuntu and wanted to make a Live CD from the hard disk installation. It was so easy using Remastersys.

I added Remastersys repositories to the sources:
deb http://www.remastersys.klikit-linux.com/repository remastersys/

Then installed Remastersys:
$ sudo apt-get update
$ sudo apt-get install remastersys

There was a menu entry "Remastersys backup" which I clicked, selected "Dist" and clicked on ok.

After some time "customdist.iso" was created in /home/remastersys/remastersys

I burned the iso to a CD and it works.

My custom distribution is Ubuntu 8.04 Hardy Heron on LXDE with all updates, gnome-games, Brasero, Mplayer, GPIC Viewer, xpdf, Synaptic, Firefox 3.0.5 (with Adobe Flash Player), Pidgin, Transmission, OpenOffice.org 3.0.1, PCManFM, Leafpad, Xarchiver. The size of the iso is 686.5 MB

Monday, February 02, 2009

My review of KDE 4.2

I am not a fan of KDE or Gnome since both have become too heavy for the kind of machines I use but I try when something new comes up. I had tried KDE 4.0 last year and wrote about the Desktop Widgets.

Since KDE 4.2 is having many new features i decided to install it. I have Ubuntu 8.04 on this machine but KDE 4.2 is not available for this version. I decided to install Kubuntu 8.10 for a change. After installation I applied all the updates. Then added the following repository:
deb http://ppa.launchpad.net/kubuntu-experimental/ubuntu intrepid main

and the package signing key through the command:
gpg --keyserver keyserver.ubuntu.com --recv-keys 493B3065 && gpg --export -a 493B3065 | sudo apt-key add -

Then updated through Adept Updater tool in the system tray.

After reboot it was KDE 4.2.

Some people don't like the application launcher of KDE 4 for them the old launcher has been added as a widget called traditional menu based launcher. There are many widgets and I have added Analog clock, CPU Temperature, weather, Twitter and Calculator and you can see them on the screenshot below:


In addition the KDE Window Manager has Desktop effects like COMPIZ and you can see the cube below:

Friday, January 30, 2009

My review of KNOPPIX 6.0

I am long time user of various Linux distributions and also love Live CD distributions. I had never tried KNOPPIX before. I downloaded KNOPPIX 6.0 yesterday and burnt a CD. I never burn a CD to try new distributions but I had to for KNOPPIX (that story for some other day).

KNOPPIX 6.0 comes with LXDE (which I love) as default but it also uses COMPIZ as default (this I did not know till the desktop appeared).

My review: I have fallen in love with default COMPIZ settings on KNOPPIX 6.0. See the screen shots below:

Cube with glxgears rotating inside


and this is what happens when you close an application;

Live CD has following applications:
GnomeMplayer with multimedia codecs (I tried wma and mp3)
GIMP ImageViewer xpdf
CCSM LXRandR
gconf-editor NM_Applet(0.70) PCManFM Synaptic Wavelan Xsceernsaver
elinks Icedove Iceweasel Pidgin Java6_Web_start
Open_Office_3.0.1
Leafpad LXTerminal Orca File_search_utility XArchiver

on LXDE/COMPIZ
with Linux 2.6.28 and Xorg 7.3 (xserver 1.4.2)

Monday, January 26, 2009

Putting small Linux Distros on one CD.

Every Linux lover often carries many linux distributions each on one CD or DVD. In addition you need some utilities like Super Grub disk etc. There is a cool script through which you can combine small distributions The latest version can be used to combine:
-customized-
Debian Live binary.iso
-compilation-
Ultimate Boot CD ubcd.iso
-very small-
DSL dsl.iso
Puppy puppy.iso
Feather feather.iso
SliTaz slitaz.iso
-rather small-
Slax slax.iso
Slax modules *.lzm
DeLi Linux deli.iso
TinyMe timyme.iso
anitX antix.iso
Wolvix wolvix.iso
-partitoning and specialized-
RIPLinuX riplinux.iso
SystemRescueCd sysrcd.iso
Trinity Rescue Kit trk.iso
Parted Magic pmagic.iso
GParted Live gparted.iso (can't be on same CD as Debian Live)
Offline NT Password & Registry Editor ntpasswd.iso
EASEUS Disk Copy diskcopy.iso
Clonezilla clonezilla.iso
PING ping.iso
-installers-
NetbootCD netbootcd.iso
Ubuntu (hardy or intrepid) mini.iso ubuntu-mini.iso
Debian (etch, lenny or sid) mini.iso debian-mini.iso
Fedora 9 netinst fedora-boot.iso
openSUSE NET iso opensuse.iso
Mandriva boot.iso mandriva-boot.iso
Arch Linux FTP or CORE arch.iso
FreeDOS base or full CD fdbasecd.iso/fdfullcd.iso
-utilities-
Any floppy disk image *.img or *.imz (could be Super Grub Disk, MS-DOS, etc.)
Any floppy disk image games/*.img or games/*.imz (for bootable DOS disk images with games, like this one)
GRUB4DOS grub.exe grub.exe
DBAN iso image dban.iso
Balder (FreeDOS) automatic
Memtest86+ automatic

The site is at Tuxfamily.

Friday, December 19, 2008

TinyCoreLinux

TinyCoreLinux the wonderful 10 MB Linux Distribution on which you can add applications and run.

You can see icons of aterm, panel, applications_browser, emelfm, Leafpad, Firefox and GIMP on Wbar.

I have downloaded the wallpaper and added Tinycore logo using GIMP.


Here is the wallpaper image without Wbar for you.


and here is the original image:

Monday, December 08, 2008

Rediscovering SLAX .

I had checked SLAX in Feb 2008. Today I decided to download version 6.0.7 and try it. As before I mounted the iso and copied it to a spare partition and edited grub to add the following entry:
title SLAX 6.0.7
root (hd0,X)
kernel /boot/vmlinuz root=/dev/ram ramdisk_size=6666 rw changes=/dev/hdd(X+1) autoexec=xconf;telinit~4
initrd /boot/initrd.gz
boot

As before I opened KDE Control Center, clicked on Regional and accessibilty, Keyboard Layouts and removed all Keyboards except US English and added India. I also added ttf-indic fonts.through System Administration, Font Installer.

Then I searched for Firefox 3 Slax module and downloaded it with following dependencies:
SQlite 3.6.6.2
libgconf2-4
libgnomevfs2.0
liborbit2
Gecko-Seamonkey-Proof-Of-Concept 1.0.0

As before I copied the modules to /mnt/hddX/slax/modules and activated them through System/Slax Module manager.

Saturday, December 06, 2008

Tiny Core Linux -- New arrival on small Linux Distributions.

As per the Welcome page on Tiny Core Linux:
Tiny Core Linux is a very small (10 MB) minimal Linux Desktop. It is based on Linux 2.6 kernel, Busybox, Tiny X, Fltk, and Jwm. The core runs entirely in ram and boots very quickly.

It is not a complete desktop nor is all hardware completely supported. It represents only the core needed to boot into a very minimal X desktop typically with wired internet access.

The user has complete control over which applications and/or additional hardware to have supported, be it for a desktop, a nettop, an appliance, or server, selectable from our online repository.

I came to know about it on Ubuntuforums and downloaded it immediately. Generally I don't burn a CD for trying Linux distributions but mount the iso on a directory on /tmp and copy the contents to a spare partition. This time I did not copy even to the spare partition since it is 10 MB only and copied it to /tinycore on Ubuntu. I added following entry to /boot/grub/menu.lst:

title Tinycore

root (hd0,X)

kernel /tinycore/boot/bzImage

initrd /tinycore/boot/tinycore.gz

It booted within seconds to JWM Desktop using Xvesa. Since my BIOS is quirky the desktop was showing funny colours on Xvesa with 1024x768 resolution. I changed the resolution in .xsession file to 640x480x16 and the colours were normal.

Since the resolution was not acceptable I installed Xorg but it failed with fatal xserver errors. I posted on TinyCoreLinuxForums and got prompt replies. There is a bug in xserver 1.5.1 for intel driver and I had to manually add the modules agpgart, intel-agp and drm before startx command. I was also advised to add the modules to /opt/bootlocal.sh so that they are loaded before start of X server.

I installed Opera and posting this from Opera running on TinyCoreLinux, Xorg 7.4.

Tuesday, December 02, 2008

Kazehakase 0.5.4.2 on Ubuntu Hardy Heron

Kazehakase version 0.5.2 is available on Ubuntu Hardy Heron which has bugs. When you click on preferences it crashes with segmentation fault. I decided to install the version 0.5.4.2 available in Debian Lenny and downloaded the .deb and tried to install. The package complained for following dependencies to be installed:
libgcrypt11
libgnutls26
libxcbrender-util0

I downloaded .deb packages for the above libraries from Debian Lenny and installed and could install kazehakase .deb package.

Kazehakase is much lighter than Firefox and has all the features.

Saturday, November 29, 2008

Ubuntu Hardy Heron Cube.


This machine specs:
description: Desktop Computer
product: EXPO-LD
vendor: HCL Infosystems Limited
version: 1.XX
description: CPU
product: Intel(R) Pentium(R) 4 CPU 2.66GHz
-memory
description: System Memory
size: 256MiB
display UNCLAIMED
description: VGA compatible controller
product: 82915G/GV/910GL Integrated Graphics Controller
vendor: Intel Corporation

Thursday, November 27, 2008

Trying Fedora 10 Live CD.

Today, I have downloaded Fedora-10-i686-Live.iso and burned a CD. sha1sum was ok. CD integrity was ok. CD was working well on Laptop.

On Desktop it was not going beyond liveuser login screen and I think that the system was failing to detect the hardware.

I posted on Fedora Forum then searched bugzilla and found bug for the intel chipset of the desktop.

Meanwhile my forum post was replied and I was advised to boot in run level 3 and copy the following xorg.conf:
Section "ServerLayout"
Identifier "single head configuration"
Screen 0 "Screen0" 0 0
InputDevice "Keyboard0" "CoreKeyboard"
EndSection

Section "InputDevice"
Identifier "Keyboard0"
Driver "kbd"
Option "XkbModel" "pc105+inet"
Option "XkbLayout" "us"
EndSection

Section "Device"
Identifier "Videocard0"
Driver "vesa"
EndSection

Section "Screen"
Identifier "Screen0"
Device "Videocard0"
DefaultDepth 24
SubSection "Display"
Viewport 0 0
Depth 24
EndSubSection
EndSection


After copying the above file I could boot with startx command into gnome.

Wednesday, November 26, 2008

Updating the distribution which is not running.

Many people like me have more than one Linux distributions on different hard disk partitions but only their current favourite is in use. How to update the other distribution which is not in use?

I am using Ubuntu Intrepid Ibex and would like to update/upgrade Arch Linux which is on the other partition. I am double clicking the partition and it gets mounted at /media/disk then I am using the following commands in the terminal:
$ sudo chroot /media/disk
bash: /dev/null: Permission denied
# pacman -Syu


I just ignore the error message and type the pacman -Syu command.

Arch Linux gets updated and upgraded without running it.

Tuesday, November 18, 2008

ZTE MG880 CDMA USB Modem on Puppy Linux

Reliance India provides ZTE MG880 CDMA USB Modem and one friend of my son-in-law arrived yesterday with a Laptop on which Windows partition was reformatted recently and he had no driver CD for the Modem. In addition sound was not working on the Windows desktop.

I popped in Puppy Linux 4.0 CD into his Laptop and showed him how to mount his Windows NTFS partitions and started playing one MP3 file from D:/ drive. Then I opened one .doc file into Abiword. He was very much impressed. Then he gave me the USB modem and asked me how to connect.

Puppy Linux could detect the modem but could not load the module. I googled and found the solution which was working on Ubuntu.
# modprobe usbserial vendor=0x19d2 product=0xfffd

and to use the following /etc/wvdial.conf file:
[Dialer zte]
Init1 = ATZ
Init2 = ATQ0 V1 E1 S0=0 &C1 &D2 +FCLASS=0
Modem Type = Analog Modem
Phone = #777
Username = 93XXXXXXXX
Password = 93XXXXXXXX
ISDN = 0
SetVolume = 0
FlowControl = Hardware (CRTSCTS)
Modem = /dev/ttyUSB0
Dial Command = ATDT
Baud = 460800
Stupid Mode = 1

The above configuration did not work on Puppy. Then I found that Puppy was linking the modem to /dev/USB/ttyUSB0, accordingly, I changed the Modem= line to:
Modem=/dev/USB/ttyUSB0

After changing the line I got following error:
PPP daemon dies (exit code =2).

On checking /var/log/messages following errors were found:
(none) daemon.err pppd[6304]: Can't open options file /etc/ppp/peers/wvdial: No such file or directory
(none) daemon.err pppd[6317]: Can't open options file /etc/ppp/peers/wvdial: No such file or directory
(none) daemon.err pppd[6352]: Can't open options file /etc/ppp/peers/wvdial: No such file or directory

I copied the file /etc/ppp/wvdial into /etc/ppp/peers directory and finally, I could connect to internet.

He wished that there was Skype on Puppy. I got the link for .pet for Skype on Puppy Linux Forums and installed.

I think I have added one user in the Puppy Linux community.

Sunday, November 16, 2008

Standalone Compiz Fusion on March Linux.

As written on this post I had installed March Linux 2.0 on hard drive. I added Standalone Compiz Fusion to the installation


and discovered that like other Window Managers Compiz Fusion could be installed without any particular desktop environment.

PCManFM is already there to provide the wallpaper and File Manager. There are two LXPanels like Gnome on March Linux 2.0. What else you need?

Thursday, November 13, 2008

March Linux 2.0 installation on hard drive.

March Linux 2.0 is based on Arch Linux with openbox, pcmanfm, lxpanel, lxappearance etc. The developer has built a Live CD using Linux Live scripts and SLAX kernel. Beta1 iso of the Live CD is available here for testing.

I tried the Live CD and liked it. Although, installation is not possible directly from Live CD, the developer started writing a procedure on its wiki.

I tried to install but it failed at Kernel installation stage at Step 6. The developer advised to use this procedure on ArchWiki. I had to create /proc /sys /dev directories before starting the ArchWiki procedure, which was required only for kernel installation. All the packages were already available on the hard disc through Step 4 (Unsquashing modules) of March Linux wiki page.

Grub could not be installed properly but I could boot the system after adding following lines to existing /boot/grub/menu.lst
title Marchlinux (on /dev/sda3)
root (hd0,2)
kernel /boot/vmlinuz26 root=/dev/sda3 ro
initrd /boot/kernel26.img

title Marchlinux (on /dev/sda3) fallback
root (hd0,2)
kernel /boot/vmlinuz26 root=/dev/sda3 ro
initrd /boot/kernel26-fallback.img

Before booting I created /etc/fstab and configured /etc/rc.conf file.

I could run the installed system on the hard drive. I created a user before starting X.

Since it is based on Arch Linux I could upgrade to the latest packages on Arch through pacman. There was an error during upgrade and I had to remove a symlink /usr/lib/klibc/include/asm

I am very happy to use this variant of Arch.

Tuesday, November 11, 2008

Restore Grub

I am using Linux for more than 4 years but never used Grub command line to restore grub. I have used Puppy Linux Live CD GUI to restore Grub. Today I decided to use Grub command line.
$ sudo grub
[ Minimal BASH-like line editing is supported. For
the first word, TAB lists possible command
completions. Anywhere else TAB lists the possible
completions of a device/filename. ]

grub> find /boot/grub/stage1
(hd0,2)
(hd0,5)

grub>
root (hd0,5)

grub> setup (hd0)
Checking if "/boot/grub/stage1" exists... yes
Checking if "/boot/grub/stage2" exists... yes
Checking if "/boot/grub/e2fs_stage1_5" exists... yes
Running "embed /boot/grub/e2fs_stage1_5 (hd0)"... 16 sectors are embedded.
succeeded
Running "install /boot/grub/stage1 (hd0) (hd0)1+16 p (hd0,5)/boot/grub/stage2
/boot/grub/menu.lst"... succeeded
Done.

grub> quit
$
There is Ubuntu Intrepid Ibex installed on (hd0,5) and I installed OzOS (Ubuntu variant using E17 Desktop) on (hd0,2) which overwrote the MBR. Now I want to format (hd0,2) but if I do it without setting up the Grub's MBR pointing to (hd0,5) my system would become un-bootable.

By the command root (hd0,5) I have told Grub to use the menu.lst of (hd0,5) while setting up.

Simple, isn't it, only three commands:
grub> find /boot/grub/stage1
grub> root (hd0,X)
grub> setup (hd0)
Now suppose I want to boot OzOS installed on (hd0,2) I can edit menu.lst on (hd0,5) and make an entry to boot it but I decided to use some other way which is not commonly used to boot Linux.

$ sudo grub
grub> root (hd0,2)
grub> setup (hd0,2)
Checking if "/boot/grub/stage1" exists... yes
Checking if "/boot/grub/stage2" exists... yes
Checking if "/boot/grub/e2fs_stage1_5" exists... yes
Running "embed /boot/grub/e2fs_stage1_5 (hd0,2)"... failed (this is not fatal)
Running "install /boot/grub/stage1 (hd0,5) /boot/grub/stage2 p /boot/grub/menu
.lst "... succeeded
Done.

grub> chainloader +1
grub> boot
I have setup grub of (hd0,2) on the partition itself instead of MBR and edited menu.lst as follows:
title OzOS
root (hd0,2)
chainloader +1
When I select OzOS on grub installed on MBR it "chainloads" the bootloader installed on (hd0,2) which opens another boot menu (listing menu.lst of hda3).

Tuesday, November 04, 2008

Wireless Networking using Intel PRO/Wireless 3945ABG, Netgear WG111v3 802.11g Adapter [realtek RTL8187B]

As written in this post I had set up Wireless network at my daughter's home. We had a guest who wanted to use the router to check his mail. I went into the router configuration, disabled MAC Filter temporarily so that he could connect and I could get the MAC address of his Laptop in the router. I added the MAC address to the filter and enabled it again.

Later on I requested him to give his Laptop to me for a few minutes.I inserted Ubuntu 8.10 Intrepid Ibex Live CD in the machine and started Live session. I wanted to set up the wireless access through the Network Manager. The network card was Intel PRO/Wireless 3945ABG which was detected and configured as wlan0, but the Network was not available. I followed the following procedure to make it work:
Right click on Network Manager Icon
Click on Edit Connections
Click on Wireless Tab
Click on Add button
Enter SSID: Default
Put checkmark on System settings
Click on OK.

The Network Manager will say:
Connection Established

The guest was also carrying an old Laptop and Netgear WG111v3 802.11g Adapter [realtek RTL8187B] (USB). I decided to check it on the Desktop which had wired network. The adoptor was also detected and set up as wlan0 upon insertion in the USB slot. I had to apply the same procedure to make it work.

This was my first experience of setting up wireless on Ubuntu.

Wednesday, October 29, 2008

Ubuntu 8.10 Intrepid Ibex experience.

I am at Bhubaneswar and using my daughter's old desktop. This can be called old because it arrived with 128 MB RAM and another 512 MB was added 3 years ego on my advice. This desktop is not used by my daughter but my granddaughter who will be 3 years old next month. I have installed Ubuntu in dual boot with XP on it starting with version 5.04. In fact two partitions are dedicated to Ubuntu on this machine.

It already had Ubuntu Hardy Heron and Dapper Drake. I decided to remove Dapper and install Intrepid Ibex and downloaded RC because I may be leaving this place after Diwali.

Generally I don't burn any CD for installing Ubuntu (or any other distribution unless essential). I copied the Live CD to a spare partition and edited grub to boot.

Normal Live session produced blank screen. I added "xforcevesa" to the kernel line in grub and could boot into Live session and tried to install.

Ubiquity failed to detect the hard disk partitions which I promptly reported on Ubuntuforums. Then I found a new option "Create a USB startup disk" in System/Administration. I used it and it copied the Live CD to the USB stick.

After setting BIOS to boot from "USB-HDD" I could boot into another Live session after selecting "Safe Graphics Mode" on boot menu. Ubiquity failed to detect the hard disk once again. Meanwhile, there was a reply to my post on Ubuntuforums that in case I was booting from hard disk partition, it gets mounted at /cdrom and hard disk partitions (of that disk) are not detected by Ubiquity..

Since I had not deleted Live CD from the hard disk partition, it was getting mounted at /cdrom although, I was booting from USB stick (Funny Linux). I reformatted the partition and rebooted and this time Ubiquity detected all hard disk partitions.

I installed Ubuntu 8.10 Intrepid Ibex replacing Dapper Drake.

But I was not happy with vesa driver. I replaced it with intel in xorg.conf. I could get up to GDM login screen and system hangs with blank screen. I had to do hard reset.
I booted into the Hardy Desktop and looked at /var/log/Xorg.0.log (of Intrepid) and found many lines with this error at the tail:
[mi] EQ overflowing. The server is probably stuck in an infinite loop.

I added openbox and found that I could login to openbox session with intel driver without any problem and concluded that I should disable visual effects on Gnome. I posted once again on Ubuntuforums and was advised to remove compiz and compiz-core.

I went into single user mode and removed compiz and compiz-core which removed many other packages related to compiz.

Now I could boot into Gnome with intel driver.

NB: While using vesa driver I did update and upgrade before removing compiz. It can be concluded that compiz is not working on intel driver as on updates till now.

Saturday, October 18, 2008

Setting up Home Network on SIEMENS SL2_141 Wireless Router.

Today I have set up Home Network consisting of two Laptops and one Desktop on SIEMENS SL2_141 Wireless Router at my daughter's residence in Bhubaneswar.

The Router arrived with default settings in Bridge Mode. In Bridge Mode ISP userid and password is supposed to be given from the computer, therefore, only one machine could be connected to internet. I tested the internet connection through one Laptop and then used it to configure the router to alter the WAN settings from Bridge Mode to PPPoE. After changing the mode and rebooting the router it logged into ISP account and surfing could be done from the two Laptops and the Desktop connected through NIC to the router.

The next step was to prevent the neighbor from surfing the net on his Laptop using our router. The router was showing the MAC addresses of the two connected Laptops. I entered the MAC numbers in the MAC Filter and enabled the filter allowing access only to these machines.

I also changed the Admin password of the router, otherwise, a smart neighbor could easily disable the Mac filter of the router and surf from his Laptop.

I feel I have secured the Home network.

Sunday, September 28, 2008

Listening to musicindiaonline streams on Linux

Musicindiaonline is a nice site having music collection in most Indian Languages. The site requires you to have Real Player installed but the problem does not end there. The browser you are using should have the necessary plugins to run embeded Real Player. Most people use Firefox on Linux, therefore, I will take the example of Firefox to proceed futher.

So you have installed Real Player if not go to Real.com/linux and download the latest real Player 11 binary. You can install in /opt directory (which is default) or in your /home directory.

After installation see whether plugins are installed in Firefox by typing about:plugins in the address bar. Look for the plugin listed as:

Helix DNA Plugin: RealPlayer G2 Plug-In Compatible

File name: nphelix.so
If you don't find it you need to copy the following files from /opt/real/RealPlayer/mozilla directory to /mozilla/plugins directory:
nphelix.so nphelix.xpt

In default Firefox installation this directory is /usr/lib/mozilla/plugins. If you are runnimg Iceweasel on Debian it is /usr/lib/iceweasel/plugins

After copying the files check once again by typing about:plugins in the address bar.

If you have totem installed you need to remove the following totem plugin files which may conflict with running Real Player on this site:
libtotem-complex-plugin.so libtotem-complex-plugin.xpt libtotem-gmp-plugin.so libtotem-gmp-plugin.xpt

Now go to Musicindiaonline and play your favorite song.

Some songs use the dnet codec which is not present in Real Player 11 due to licensing restrictions. You can search for follwing files on Google:
ddnt.so.6.0 dnet.so.6.0

Copy these files in /opt/real/RealPlayer/codecs and create the following symlink:
ln -s dnet.so.6.0 dnet.so

Enjoy.

Monday, September 22, 2008

Archlinux has least memory usage compared to Debian and Ubuntu.

I install any Linux distribution after copying the contents of ISO to a spare partition on the hard disc. For Archlinux I found this page. As suggested I downloaded FTP USB variant of the ISO from this page. I copied the contents of the ISO as suggested using dd command. The document suggest to chain load the installation boot menu. It did not work for me, therefore, I made following entries in /boot/grub/menu.lst to boot the installer.
title ArchLinux Installation System
root (hd0,1)
kernel /boot/vmlinuz26 lang=en locale=en_US.UTF-8 ramdisk_size=75%
initrd /boot/archlive.img
I use the USB port of my router but the installer, although, detecting it as eth1 did not work, therefore, I connected it through NIC. The installer downloaded and installed the base system. The Grub of Archlinux does not detect other operating systems on the hard disc, therefore, I did not install it to MBR.

After rebooting I made necessary entry for new Archlinux installation in existing Grub

title Arch Linux
root (hd0,0)
kernel /boot/vmlinuz26 root=/dev/disk/by-uuid/72e737f9-5faf-4103-bfe2-84f9a01c4dab ro
initrd /boot/kernel26.img
and rebooted again into Archlinux base install.

On the other PC I had opened the very elborate Beginners Guide on Archwiki. I followed it step by step to install xorg and LXDE desktop environment.

The screen of my Laptop is broken and I use it as desktop through external monitor. The ati driver of Xorg 7.3 has a bug and as expected I got blank monitor on startx command.

In order to generate xorg.conf for xvesa I used the following method:
# pacman -S hwd
# hwd -u
# hwd -x

The last command generated xorg.conf files for vesa and ati driver. I copied the vesa file to /etc/X11/xorg.conf and could boot into LXDE desktop.

I find the LXDE desktop on Archlinux having less memory usage compared to Ubuntu Cli and Debian Cli.
On LXDE+LXTerminal (Debian uses 104 against 67 by Arch)
$ free -m
Total used free shared buffer cache
Mem: 312 67 244 0 5 32
-/+buffers/cache 29 282

Monday, September 01, 2008

My tryst with computers.

Some people from my ET batch were taken to manage IT in BHEL Hardwar in 1974, therefore, as such "Computers" had already arrived when I began my career.


I have seen those stupid cards on which Data was being punched and fed into mainframes but was not personally involved.


During 1983 to 87 I was responsible for accepting the 200 MW Steam Turbines of NTPC and was getting fed up with manual calculations with Calculators and learned to write small programs in BASIC. I asked my brother-in-law to bring a calculator from USA which had P1, P2 etc programmable keys in BASIC worth $80 (I think $ may be around Rs 30). I had put even Steam Table Formulations in those keys apart from mass flow calculations.


IBM PC arrived in USA in Aug 1981 and also in India soon thereafter but I could use only in late eighties since I was transferred to NTPC project in 1987. I have used 386 and 486 in DOS for dbase and lotus. I use to get data on floppies from Mainframe in print file format and had developed program to extract it into dbase.


Windows arrived in 1990 but I could use it only in 1996 when I came to Delhi. I made a complete Tender Proposal in Excel linking many sheets and even files wuth macros. Soon I became an expert to remove viruses from Word and Excel files.

I bought my home desktop in 1997 with genuine Windows 98 and was using Star Office and free software only.

I bought personal Laptop in 2004 which came with Mandrakellinux 9.0 CDs and my tryst with linux began.

Sunday, August 31, 2008

How to post your top 10 used terminal commands.

You need to use terminal on Linux often. Recently one Ubuntuforum member posted this code to know the top 10 terminal command used by you.
history | sed -e 's/  / /g' | cut -d " " -f3 | sort | uniq -c | sort -n | tail | sort -nr

You can copy the code and paste in the terminal and know the results.

Wednesday, August 20, 2008

Yamaha opl3sa2 sound card configuration through alsaconf on Debian Lenny.

I have mentioned about my old desktop Intel Pentium 200 Mhz MMX 32 MB RAM many times on this blog. This PC has a legacy ISA sound card Yamaha opl3sa2. Puppy Linux has the utility alsaconf which detects and configures this card correctly. I have 256 MB swap partition and Puppy Linux uses it, therefore, it is possible to take out the Puppy Linux CD and play an audio CD.

I have recently installed Debian Lenny on this desktop and wanted to configure the sound card. I installed alsa-utils package which contains alsaconf. Following are the steps:
$ su
Enter root password
# apt-get install alsa-utils

After installations I got alsaconf in Debian menu. I clicked on it and had to enter the root password once again.

The first screen read:
No supported PnP or PCI card found. Would you like to probe legacy ISA cards/chips
yes

Next screen:
Probing legacy ISA cards might make your system unstable. Are you sure to proceed.
yes

Next screen:
Probing legacy ISA cards. Please select the drivers to probe.
[*] opl3sa2 Yamaha OPL3SA2+

I deselected other drivers.

Next screen:
Shall I try all possible DMA and IRQ combinations? With this option, some unconventional configurations might be found, but it will take much longer time.
yes

Next screen:
Configuring opl3sa2. Do you want to modify /etc/modprobe.conf
yes

Next screen:
OK. Sound driver configured. ALSA mixer used to raise volume. You can change the volume later.
ok

Next screen:
The mixer is set up now for playing. Shall I try to play sound sample now?
yes

After sound card configuration I downloaded the command line CD player cdcd (it was dcd on earlier versions of Debian).

# apt-get install cdcd

Now I am happily playing an audio CD and surfing through Kazehakase (or elinks) on Debian Lenny IceWM desktop on 32 MB RAM.

Sunday, August 17, 2008

How to password protect a file on Linux?

This question is being asked by many Linux users on various forums. Today I searched on Google and found this solution on Linuxforums.org.

You can password protect a zip file. Proceed as follows:

Create a directory for this experiment, and name it test.
Copy a few files and paste them into this directory so it isn't empty.Now open a terminal and enter:$ zip -e -r test test
Enter password:Verify password:Delete the directory test.

Now you have a file test.zip which is password protected.
zip with -e option encrypts the contents of the zip archive using a password. This encrypts with standard pkzip encryption which is considered weak.

However, the job of protecting the file is done, because even the root user needs the password or should be a hacker to decrypt.

I also recommend the method suggested in the comments.
If the filename is test,
$ gpg --symmetric test
It will ask the password and create a file test.gpg
Delete the file test.

Use the following command to open the file:
$ gpg test.gpg
It will ask the password and create the test file.

Tuesday, July 29, 2008

Debian Lenny rocks on 32 MB RAM.

Recently I downloaded the 150 MB netinst CD image of Debian Lenny Beta2 from this page.

Initially I installed it on my COMPAQ Presario 2500 series Laptop. After installing the base system I added xorg, IceWM and slim since I wanted very lightweight system. I found really a very light Debian.

Inspired by the lightness I decided to try it on my old desktop Pentium MMX 200 Mhz 32 MB RAM.

The installer went into Low Memory mode and loaded minimum installer components and asked to add additional components I wanted. I did not add anything. This resulted into failure of Network Card Detection. I bypassed the Network Configuration. The installer contacts NTP server after Network configuration. When it could not contact NTP server it simply asked whether hardware clock was set to UTC or not and proceeded to install the base system. The installer automatically selected the 486 Kernel image. At select and install software stage (after Base Install) I unchecked every thing and the base installation was finished.

After booting I configured the network by editing /etc/network/interfaces file and started the network. I updated and upgraded the system through apt-get (including Kernel 2.6.24 to 2.6.25) and could reboot into the new Kernel.

I added xorg and icewm and edited xorg.conf to configure the serial mouse, added Modeline, PreferredMode in Monitor Section, Default depth, depth and Mode to use in screen section. I made .xnitrc to boot into IceWM and used startx to get into IceWM.

The result on IceWM:
$ free -m
Total used free
Mem: 28 26 2
-/+ buffers/cache11 17
Swap 243 1 243

$ ps aux | wc -l
31

I have reduced the tty terminal processes by commenting getty lines in /etc/inittab file.

I added Kazehakase web browser. It gives performance similar to Firefox 1.5 on old DSL.

Wednesday, July 09, 2008

How to install LXDEbuntu.

I had installed lxde on Ubuntu Hardy command line earlier but certain things did not work like mounting of partitions, icons on application launcher.

Today I discovered another way of installing lxde on minimum Ubuntu and it is full proof and it works.

1. Install complete Ubuntu Hardy Heron.
2. Add lxde and login to it.
3. Remove Gnome completely through the following command:
$ sudo apt-get remove alacarte bluez-gnome brltty brltty-x11 bug-buddy capplets-data cdrdao cli-common compiz compiz-core compiz-fusion-plugins-extra compiz-fusion-plugins-main compiz-gnome compiz-plugins compizconfig-backend-gconf contact-lookup-applet dcraw deskbar-applet diveintopython ekiga eog espeak evince evolution evolution-common evolution-data-server evolution-data-server-common evolution-exchange evolution-plugins evolution-webcal example-content f-spot fast-user-switch-applet firefox-3.0-gnome-support firefox-gnome-support gconf-editor gedit gedit-common gimp-gnomevfs gimp-python gnome-about gnome-applets gnome-applets-data gnome-control-center gnome-desktop-data gnome-doc-utils gnome-media gnome-menus gnome-netstatus-applet gnome-nettool gnome-panel gnome-panel-data gnome-pilot gnome-pilot-conduits gnome-session gnome-settings-daemon gnome-spell gnome-terminal gnome-terminal-data gnome-themes gnome-user-guide gnome-utils gnome-volume-manager gstreamer0.10-plugins-base-apps gstreamer0.10-pulseaudio gstreamer0.10-tools gtkhtml3.14 gvfs gvfs-backends gvfs-fuse hwtest hwtest-gtk launchpad-integration libalut0 libao2 libarchive1 libart2.0-cil libcdio-cdda0 libcdio-paranoia0 libcompizconfig0 libcurl3 libdecoration0 libdeskbar-tracker libdirectfb-1.0-0 libedata-book1.2-2 libedata-cal1.2-6 libedataserverui1.2-8 libeel2-2 libeel2-data libegroupwise1.2-13 libexchange-storage1.2-3 libexempi3 libflickrnet2.1.5-cil libgconf2.0-cil libgdata-google1.2-1 libgdata1.2-1 libglade2.0-cil libglew1.5 libglib2.0-cil libgmime-2.0-2 libgmime2.2-cil libgnome-pilot2 libgnome-vfs2.0-cil libgnome-window-settings1 libgnome2.0-cil libgnomevfs2-bin libgnomevfs2-extra libgpgme11 libgpod-common libgpod3 libgtk2.0-cil libgtkhtml3.14-19 libgtkhtml3.16-cil libgtksourceview2.0-0 libgtksourceview2.0-common libgvfscommon0 libgweather-common libgweather1 libicu38 liblpint-bonobo0 libmono-addins-gui0.2-cil libmono-addins0.2-cil libmono-cairo1.0-cil libmono-corlib1.0-cil libmono-corlib2.0-cil libmono-data-tds1.0-cil libmono-data-tds2.0-cil libmono-security1.0-cil libmono-security2.0-cil libmono-sharpzip0.84-cil libmono-sharpzip2.84-cil libmono-sqlite2.0-cil libmono-system-data1.0-cil libmono-system-data2.0-cil libmono-system-web1.0-cil libmono-system-web2.0-cil libmono-system1.0-cil libmono-system2.0-cil libmono0 libmono1.0-cil libmono2.0-cil libmtp7 libmusicbrainz4c2a libndesk-dbus-glib1.0-cil libndesk-dbus1.0-cil libneon27 libopal-2.2 libopenal0a libopenobex1 libpam-gnome-keyring libpisock9 libpisync1 libpt-1.10.10 libpt-1.10.10-plugins-alsa libpt-1.10.10-plugins-v4l libpt-1.10.10-plugins-v4l2 libpth20 libpulsecore5 librarian0 libsamplerate0 libsdl1.2debian libsdl1.2debian-alsa libsgutils1 libsmbclient libsoup2.4-1 libsqlite0 libtracker-gtk0 libvorbisfile3 libwpg-0.1-1 libwps-0.1-1 libx11-xcb1 libxml2-utils mesa-utils metacity mono-common mono-gac mono-jit mono-runtime mousetweaks nautilus nautilus-cd-burner nautilus-data nautilus-sendto nautilus-share o3read obex-data-server openoffice.org-base-core openoffice.org-calc openoffice.org-common openoffice.org-core openoffice.org-draw openoffice.org-gnome openoffice.org-gtk openoffice.org-impress openoffice.org-style-human openoffice.org-writer pkg-config pulseaudio pulseaudio-esound-compat pulseaudio-module-gconf pulseaudio-module-hal pulseaudio-module-x11 python-gmenu python-gtksourceview2 python-uno rdesktop rhythmbox rss-glx scim-bridge-agent scim-bridge-client-gtk seahorse sound-juicer sqlite sqlite3 ssh-askpass-gnome tangerine-icon-theme tomboy totem-mozilla tracker tracker-search-tool tsclient ttf-opensymbol ubuntu-desktop ubuntu-docs ubuntu-sounds usplash-theme-ubuntu vino whois xdg-user-dirs xdg-user-dirs-gtk xsane xsane-common xsltproc xulrunner-1.9-gnome-support yelp
This command has been copied from psychocats.net.

Thursday, July 03, 2008

My struggle with Ubuntu Hardy Heron.

Ubuntu 8.04 Hardy Heron arrived with Xorg 7.3 which brought many bugs. Prior to the launch of Hardy I had a glimpse of the troubles ahead when I tried PUD Linux LXDE version which was based on Hardy beta. Actually the problem was not with Hardy but with my Laptop whose display is broken and I use it as a Desktop along with external monitor.

When I tried PUD Linux the external monitor worked till GDM was started, then it became blank. I shifted to console by pressing Ctrl alt F2 and opened xorg.conf file and found the file was as good as not being there. It had no configurations. This was due to the new concept of auto-magic in Xorg 7.3. This concept had arrived in Ubuntu Gutsy Gibbon in which if you delete xorg.conf you could still boot into the desktop. But in Gutsy you could rebuild the file through dpkg-reconfigure command. In Hardy dpkg-reconfigure xserver-xorg did not work. I tried to copy the xorg.conf from Gutsy but it did not work.

When Ubuntu Hardy Heron arrived I studied the changes in xorg.conf and wrote the file using vesa driver and after one or two changes it worked and I could get the desktop using vesa driver.

The video card in my Laptop is ATI Radeon IGP 340M and the driver used in Xorg 7.3 had a bug which was reported at bugs.freedesktop.org on 25th April 08.

The bug was resolved in June 08 and within a week the .deb file of updated ati driver appeared on Debian Sid (Unstable) repositories. I downloaded the .deb and its dependencies and installed on Ubuntu Hardy Heron and it works.

Now I could switch off the broken display of the Laptop through the command:
xrandr --output LVDS --off

Tuesday, July 01, 2008

Rediscovering Puppy Linux.

 This is very old post, the new one is here.

I have always admired Puppy Linux for its hardware detection, speed etc. The main reason for not using it regularly was my love for Hindi and Marathi sites which required perfect rendering of Indic fonts. Firefox 2.0 and earlier versions required Firefox build with pango which was not available for Puppy Linux. Firefox has recently launched version 3.0 which provides out of the box support for Indic script (no special build is required now). I decided to give another try to Puppy Linux.

I downloaded Puppy 4.0 iso and mounted it on /tmp/puppy by following command:
sudo mount puppy-4.00-k2.6.21.7-seamonkey.iso -o loop /tmp/puppy

and copied the following files to a spare partition in /puppy400 folder:
sudo cp vmlinuz initrd.gz pup_400.sfs zdrv_400.sfs /media/hda8/puppy400

then I added following lines to /boot/grub/menu.lst
title Puppy Linux 4.00 frugal
rootnoverify (hd0,7)
kernel /puppy400/vmlinuz pmedia=idehd psubdir=puppy400
initrd /puppy400/initrd.gz

and I could boot into frugal install of Puppy Linux on my machine. The first step in Puppy Linux is to configure the internet connection by clicking on the "connect" icon on the desktop. Configuring eth0 is very easy.

Next step was to add Indic fonts. I downloaded the fonts from Indlinux site, created .fonts folder in /root and copied the fonts folder "Open Type" in it.

Then I searched on Puppy Linux Forum for Firefox 3.0 and found following .pet packages:
firefoxfix-1.0.0.pet
firefox-3.0.pet

firefoxfix-1.0.0.pet is required to resolve the dependencies for Firefox 3.0.

My next project was to add Hindi Keyboard and the Desktop applet to toggle between English and Hindi Keyboard. Hindi keyboard could be added by clicking on Menu/Setup/Mouse/Keyboard_wizard/Advanced_Xorg_keyboard_configuration/Layouts/ and selection "in India".

Adding fbxkb applet was a little difficult because I had to compile it from source. For compiling on Puppy Linux you need to download devx_400.sfs and copy it to / of the partition.

Then I downloaded fbxkb-0.4.tgz source package, extracted it, entered the directory and issued ./configure and make commands. (Note versions 0.5 and 0.6 of fbxkb do not work on Puppy Linux).

In Puppy Linux you give the following command instead of "make install"
new2dir make install

By the above command Puppy Linux makes separate directory for the package. You convert the directory into .pet package by following command:
dir2pet fbxkb-0.4-i486

and I got the .pet file:
fbxkb-0.4-i486.pet

fbxkb does not come with Indian Flag. I added it to /usr/share/fbxkb/images/

After giving fbxkb command I got the US Flag icon on the panel and clicking on it changed to Indian Flag (Hindi Keyboard).

Sunday, June 22, 2008

SliTaz -- 25 MB Live Distro.

I decided to try SliTaz the 25 MB Live Linux wonder. The beauty of SliTaz is in its rootfs.gz file which is compressed using LZMA compression. As per the Documentation the file can be extracted using lzma and cpio with following command:
# lzma d rootfs.gz -so | cpio -id

I mounted the iso and tried the above command in Ubuntu Hardy. Although, lzma and cpio are installed, it did not work. I decided to boot into SliTaz Live environment. I mounted the iso and copied the contents to a spare partition. Following grub line was available in /boot/grub/example-menu.lst file:

title SliTaz GNU/Linux
kernel /boot/bzImage root=/dev/null vga=771
initrd /boot/rootfs.gz

I added root (hd0,X) line and could but in Live Slitaz.Using the above command (# lzma d rootfs.gz -so | cpio -id) I could extract the rootfs.gz file. I copied contents to the root of the partition and changed the gub entry to:

title SliTaz GNU/Linux 1.0
root(hd0,X)
kernel /boot/vmlinuz-2.6.24.2-slitaz root=/dev/hdaX+1 vga=normal

This became Hard Disc install of SliTaz.

I find SliTaz very fast for web browsing.

Sunday, June 08, 2008

Slim Ubuntu Desktops.

I am Ubuntu user since version 5.04 and it use to run on Gnome Desktop on 128 MB RAM comfortably. When Dapper Drake arrived I could install it but I had to add RAM to use it. I added 256 MB. Then the Laptop Display was broken and I converted the Laptop into Desktop by connecting an external monitor. This reduced available RAM to 312 MB.

I installed Gutsy and could use enhanced Desktop effects but it was very slow. I added KDE 4 also just to see what is coming but it was slow. For daily tasks I added Fluxbox. Then I saw LXDE thread and added LXDE. Since then I was using LXDE and liked it very much.

For Hardy Heron I decided to do Cli install and add Window Managers one by one. Initially I added openbox and fbpanel. Then I tried to install lxde meta package but it failed to install due to unmet dependencies. I checked the dependencies and could not find 3 packages in Ubuntu repositories. I downloaded these packages from Debian and installed through dpkg. Finally I could install LXDE Desktop.

Initially, I did not install any Login Manager and was using startx command after console login.

Today I discovered slim login manager and installed it. On Login Screen I could select the session by pressing F1 key. The first option was XFCE which I had not installed. After pressing F1 again the second option was openbox and I could login to openbox. Third option was IceWM, so I installed IceWM and could login to IceWM session.

I searched for "slim" files and got /etc/slim.conf file. In the section "Available sessions" I changed "xfce4-session" to "lxsession" which also became the default session.

Now I could login to LXDE Desktop. Then I thought that I should add all light weight WMs to the sessions and downloaded Fluxbox and JWM and replaced "wmaker" and "blackbox" with "jwm" and "fluxbox".

I really like these "Slim Ubuntu Desktops" and slim login manager.
LXDE
openbox
IceWM
Fluxbox
JWM

Saturday, May 24, 2008

Rediscovering Mandriva with 2008 edition.

I began my tryst with linux by installing Mandrake Linux 9.1 on my then brand new Laptop in Sep 2004. In July 2005 I shifted to Ubuntu 5.04. Since then I have been an Ubuntu lover.

My love for Ubuntu is slowly fading with the RAM requirement going up with new versions. When I saw Mandriva 2008 DVD with Linux for you magazine I decided to give it a try.

I don't have DVD drive in the laptop, even the CD drive does not work. I install new versions of Ubuntu directly from iso. I have spare 1 GB partition to copy the contents of the iso. I converted Mandriva DVD into iso on another machine and copied it to my Laptop by connecting the two machines. I had to increase the spare partition to 4.5 GB since DVD is much bigger then a CD.

After reading the README and install.txt files I discovered that I had to go to this page to get the lines to write in menu.lst file of Grub boot loader. After entering the partition # on which i had copied the contents of the DVD I got the following lines:
title Mandrake Install
root (hd0,3)
kernel /i586/isolinux/alt0/vmlinuz ramdisk_size=128000 root=/dev/ram3 acpi=ht vga=788 automatic=method:disk,partition=hda4,directory=/i586
initrd /i586/isolinux/alt0/all.rdz

I copied the above lines at the end of /boot/grub/menu.lst file. On reboot I scrolled at the end of Grub menu and clicked on the line "Mandrake Install". The installation began.

Since I did not want KDE or Gnome I looked at other option which was Icewm. I decided to see what happens if I don't select any desktop environment. I was surprised to find that even then X window system was being installed. The installation was smooth. The Grub boot loader detected Ubuntu 7.10 and 8.04 installations on the machine correctly.

After reboot I logged in the command line and entered startx command. The X window system started and I got into Window Maker. There was no panel but I got a Menu on right click. In the Menu there was an optopn to start IceWM session. I selected it and I got the bottom panel and blue Mandriva wallpaper. I checked the memory usage by clicking on xterm and got the following:
$ free -m
total used free
Mem 312 91 221
buffers/cache 35 277

This means Mandriva 2008 with IceWM is suitable for 128 MB machine and the memory required is less then what I got on Ubuntu Cli and LXDE desktop.

Just out of curiosity, I installed XFCE and created .xinitrc file with following lines to boot into it on startx command:
#!/usr/bin/env bash

exec startxfce4

I got following figures on XFCE:
$ free -m
total used free
Mem 312 136 176
buffers/cache 58 253

I think XFCE may also work on 128 MB RAM but IceWM is preferable to have more memory for the applications to run.

Monday, May 19, 2008

Usability of Ubuntu on 128 MB RAM PC.

Earlier I have posted about LXDE the new light weight Desktop Environment on this blog.

I decided to install it on Ubuntu command line system to really see how light. After installing Ubuntu Cli through Hardy Heron alternate CD and adding xorg xterm and testing the X window system working properly I added the repositories as per the previous post and tried to install lxde.

Initially lxde failed to install due to unmet dependencies. I discovered that required dependencies were not available in Hardy repositories. I downloaded the following packages from Debian and installed them through dpkg:
libnetpbm10_10.0-11.1+etch1_i386.deb
netpbm_10.0-11.1+etch1_i386.deb
xscreensaver_5.04-2_i386.deb


Finally I could install lxde.

There is a big difference in memory usage compared to LXDE on full Ubuntu install and login through GDM.

Memory usage full Ubuntu install & login through GDM:
Total used free
Mem: 312 255 56
buffers/cache 74 237

Memory usage Ubuntu Cli and using startx:
Total used free
Mem: 312 166 146
buffers/cache 44 268

Note: Memory figures are on the desktop with xterm only running.

I recommend it to all Ubuntu LXDE users.


Tuesday, May 13, 2008

Using Damn Small Linux on Pentium 200 MHZ 32 MB RAM

My 4 years old Laptop was getting heated up and ACPI was shutting it down at 72 degC. I have given it to my friend for opening and cleaning. Now I am forced to use the old Desktop bought in 1998. The specifications are Pentium I MMX 200 MHZ 32 MB RAM. I am using Damn Small Linux from live CD and Firefox Browser. I have to wait after clicking on Firefox icon, then I have to wait for loading of the web page. Once loaded, I can work quickly, like I am typing this on blogger.com at normal speed.

I have Broadband connection but web page loads slowly because of memory limitation on this PC. I am trying to enjoy the slowness, particularly, the gmail and other Google Applications which have become necessary part of my online life.

Saturday, May 10, 2008

I am Linux Geek.

After using Linux for 4 years, I think that I am a Linux Geek.

Proof: After struggling with Ubuntu 8.04 Hardy Heron, I concluded that I can report a Bug in Xorg 7.3 and submitted it on freedesktop.org.

Original Specifications of my Laptop:
HP COMPAQ Presario 2500 series Laptop, Intel(R) Celeron(R) CPU 2.80GHz, CDRom, 30 GB HDD, 128 MB RAM, Mandrake Linux 9.1 Tailor made CDs with multimedia codecs and Linuxant internal free modem driver (14.4 Kbps), Radeon IGP 330M/340M/350M video card, Ethernet Card.

Bought in July 2004. Original Mandrake Linux 9.1 worked very well. Then I started using Ubuntu 5.04.

Ubuntu 6.06 Dapper Drake could be installed but was slow, therefore, I added 256 MB RAM to make it 384 MB total. With this RAM it is just suitable for today's Ubuntu. I have started using LXDE to make it faster.

Hardware Changes and Laptop turned into Desktop:
Original HDD replaced by 40 GB HDD, CDRom does not work, LCD screen is broken. I have hooked up external COMPAQ V45 monitor and using it as a Desktop.

Since CDRom does not function I install from ISO.

Difficulty in installing Ubuntu 8.04 Hardy Heron
I have installed from alternate ISO but the new Xorg 7.3 fails to show anything on the external monitor. I can see GDM login screen through broken patches on LCD screen, blindly enter my userid and password, hear the Gnome welcome music and get satisfaction that Hardy is installed.

I can see the console by pressing Ctrl Alt F1, login and try xrandr but could not make X work.

I went to Bugzilla and found a Bug in Xorg for my video card. I have also submitted a bug report.

Till the bug gets resolved using Ubuntu 7.10 with LXDE.

Monday, April 14, 2008

LXDE 0.3 - Lightweight and Fast Desktop Environment on Ubuntu.

Today I read about LXDE 0.3 - Lightweight and Fast Desktop Environment on Ubuntuforums and decided to install it on Ubuntu 7.10 Gutsy Gibbon.

I added the repository to Ubuntu sources list:
deb http://people.linux.org.tw/~pcman/ubuntu ./

then installed with apt-get
sudo apt-get update
sudo apt-get install lxde

apt-get automatically installed all dependencies including openbox and PCMAN File Manager.

After the installation, I could login to LXDE by choosing it from gdm.

It is beautiful DE with all Menu built automatically. See the sreenshot below:

Thursday, March 20, 2008

Ubuntu KDE4 Desktop Widgets

I installed KDE4 Desktop on Ubuntu 7.10 as follows:
Added the repository:
deb http://ppa.launchpad.net/kubuntu-members-kde4/ubuntu gutsy main

updated:
sudo apt-get update

installed:
sudo apt-get install kde4-core

Then I checked the available widgets in add widget dialog. There are very few.

I searched on Google "Get more widgets KDE4" and found this site.

Installed the following package:
sudo apt-get install extragear-plasma

Now see my KDE4 desktop with some of the widgets running:

There is comic strip widget at the top.
Below that there are two more:
Picture frame on left in which sideshow is running and
Dictionary.

Friday, March 14, 2008

File transfer between two machines running Ubuntu and using ssh.

I had successfully transferred a file from Windows machine to the one running Ubuntu through Samba but had no experience of a transfer between two Ubuntu machines.

I have an old desktop with 32 MB RAM on which Win98, Ubuntu server and Puppy Linux are installed. The CD drive on this machine still works. There is no USB port on this machine.

I have 3 years old Laptop on which the CD drive is not working and I don't intend to replace it.

Yesterday I was required to use some folders and files from a CD and decided to make an iso of the entire CD on the old desktop and transfer it to the Laptop by connecting the two machines.

For transferring the file I decided to use SSH, therefore I downloaded openssh-server on the desktop and installed it.

I made the iso using the dd command:
dd if=/dev/cdrom of=file.iso

I opened a Terminal on the Laptop and logged into the desktop through the command:
ssh desktopuser@ip_of_desktop

After confirming blah blah about RSA key etc I was asked the password and the terminal user changed as the desktopuser@desktop_host_name

I tried to transfer the file through scp command
scp file.iso laptopuser@ip_of_laptop:/home/laptopuser/

But found that the port 22 on the Laptop was closed.

I used the following command to see what was listening on the Laptop ports:
netstat -an | grep "LISTEN "

Although I was logged in from the Laptop to the Desktop no daemon was listening on port 22. I also changed the ssh client to openssh-client on the Laptop but could not make it listen on port 22.

I searched on Google but could not find any satisfactory solution.

Finally I decided to install openssh-server on the Laptop as well.

With openssh-server running on both the machine I could transfer the file that too after the server on the Laptop asked the password of the laptopuser.

Friday, February 29, 2008

Slax is very fast.

I love Puppy Linux because of its speed but Slax is equally fast and it has KDE desktop.

Today I downloaded the latest updated version Slax 6.0.1 which has fixed many bugs in Slax 6.0 which was launched on 13th Feb 2008.

I keep a spare 1 GB partition on my hard disc where I copy the iso and modify /boot/grub/menu.lst file to boot directly from the iso without burning CD.

First I create a "install_cd" directory in /tmp and mount the iso on it by the following commands:
mkdir /tmp/install_cd
mount slax-6.0.1.iso -o loop /tmp/install_cd


Then I copy the contents of the iso on /media/hda8 (hda8 is 1 GB partition formatted in ext3) by following command:
cp -r /tmp/install_cd/* /media/hda8


Then I edit /boot/grub/menu.lst to add the following line:
title Slax 6.0.7
root (hd0,7)
kernel /boot/vmlinuz root=/dev/ram ramdisk_size=6666 rw changes=/dev/hdd8
initrd /boot/initrd.gz


"changes=/dev/hda8" is the cheatcode for saving configurations since Slax is a Live CD distribution which is loaded into RAM.

After rebooting I could run Slax.

After setting up the Network connection (Slax sets up automatically if it is dhcp but mine is static ip) I went to Slax site and downloaded Firefox module from this page.

After downloading I copied the module to /mnt/hda8/slax/modules so that it is available permanently.

Then I activated the module through Slax Module Manager. It is really very neat.

I have also changed time zone removed many keyboard layouts which are not required added Hindi (IN) Keyboard and installed additional fonts through KDE Control Centre.

It is an excellent distribution and very fast since it runs from RAM.

Wednesday, January 02, 2008

Installing Ubuntu 7.10 on 128 MB RAM PC from Desktop CD

Ubuntu 7.10 Gutsy Gibbon Desktop (Live) CD does not run on 128 MB RAM machine but it has a boot option "only-ubiquity" for installation on Low RAM machines. I decided to install Ubuntu on 128 MB RAM desktop PC using this option.

Booting Ubuntu Live CD on low RAM machine also requires SWAP partition, therefore, I booted with Puppy Linux Live CD and created 512 MB Linux SWAP partition using Gparted. (The same could be done with Gparted Live CD or any other Linux Live CD which can boot on 128 MB RAM and has Gparted).

Then I inserted Ubuntu 7.10 Live CD and pressed "Esc" key to get the "boot:" prompt. I used the following command:

boot: live only-ubiquity

After waiting for a few minutes the first screen of Ubiquity installer was in front of me on default Ubuntu background. I did the selections on each step and chose the "Manual" partitioning method. I selected the / partition and proceeded to install.

Ubiquity took 3 hours but I could successfully install Ubuntu 7.10 Gutsy Gibbon on the machine.

Kamalakar

Wifi range extender at our new home in Salaiya, Bhopal

After selling Ankur Apartment flat at Delhi we permanently shifted to Bhopal in our new 3 BHK Flat at Canal Kinship, Salaiya, Bhopal wef 28 ...